10 Best Beginner-Friendly Home Decor Projects
Share
You're ready to change your living space into a stunning reflection of your personal style, and with these 10 beginner-friendly home decor projects, you'll be well on your way to creating a unique and Instagram-worthy oasis. From upcycled lighting fixtures that infuse personality into spaces to painting furniture like a pro, you'll excel in essential techniques to enhance your decor. Create stunning gallery walls, decoupage furniture makeovers, and rustic wooden signs that tell your story. With easy throw pillow covers, DIY macrame plant hangers, and beginner-friendly mosaic art, your space will radiate elegance and sophistication. As you start on this creative adventure, get ready to uncover the secrets to turning your home into a masterpiece that truly reflects you.
Key Takeaways
- Upcycle old lamps, chandeliers, and fixtures to create unique lighting solutions that reflect personal taste and style.
- Transform old furniture with a fresh coat of paint, new throw pillows, or decoupage to give it a new life and personality.
- Add natural and rustic elements like macrame plant hangers, reclaimed wood decorations, and rustic wooden signs to bring warmth and character to a room.
- Create artistic and decorative projects like mosaics, using simple techniques and materials to add a personal touch to home decor.
- Focus on styling and organization by creating gallery wall displays, using shelves, and arranging decorative items to create a cohesive and inviting space.
Simple Shelf Styling Ideas
As you stand before your shelves, a canvas of possibilities stretches out before you, beckoning you to release your inner curator.
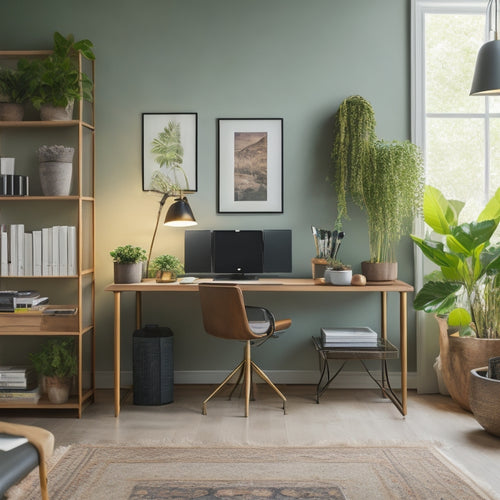
With a few simple shelf organization tips, you can change your space into a visually stunning oasis. Begin by grouping similar items together, such as books or decorative objects, and placing them on separate shelves to create a sense of cohesion.
To maintain this harmony, implement daily tidying routines and schedule regular decluttering sessions streamlining your living spaces.
Add a touch of elegance with decorative bookends, which not only keep your books upright but also add a pop of personality to your shelf.
DIY Macrame Plant Hangers
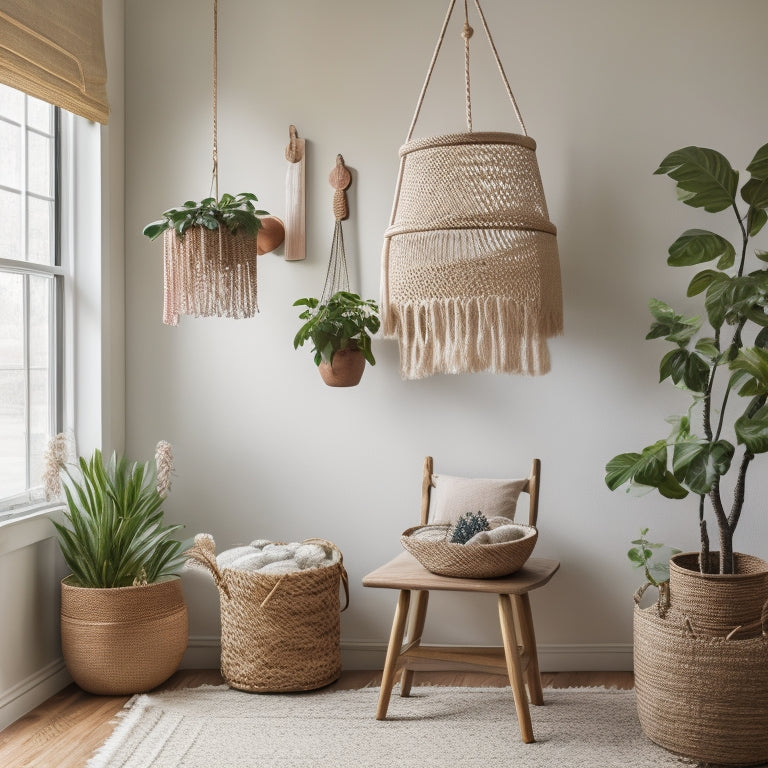
Within the domain of bohemian chic, DIY macrame plant hangers have emerged as a stylish means of showcasing your lush greenery, effortlessly elevating the ambiance of any room.
You'll be delighted to know that mastering macrame techniques is more accessible than you think. With a few basic knots and cord materials, you can create a stunning plant hanger that aligns with your personal style.
Investigate various plant hanger styles, from minimalist to intricate, to find the perfect fit for your space. As you weave and knot, you'll uncover the therapeutic benefits of macrame, and the satisfaction of creating something truly unique.
With patience and practice, you'll be adorning your walls with a bespoke plant hanger that exudes bohemian elegance.
Upcycled Lighting Fixtures
As you venture into the domain of upcycled lighting fixtures, you'll uncover a world of creative possibilities.
You can breathe new life into an old lamp by replacing its shade or refinishing its base, or take your skills to the next level by changing a vintage chandelier into a show-stopping masterpiece.
With a little imagination, you can revamp outdated fixtures into stunning, one-of-a-kind pieces that illuminate your space with personality.
Transform Old Lamps
Beyond their functional purpose, lamps are an essential aspect of a room's aesthetic, and giving new life to an old lamp can be a fantastic way to inject personality into your space.
You can rejuvenate an old lamp by updating its lamp color, which can drastically change the ambiance of the room. For instance, a bold, bright shade can add a pop of color, while a soft, pastel hue can create a calming atmosphere.
Additionally, you can swap out the shade materials to match your desired style. Replace a plain white shade with a unique, textured material like burlap or linen to add depth and visual interest.
With a little creativity, you can convert an old lamp into a stunning piece that reflects your personal taste.
DIY Chandelier Makeover
You're about to reveal the secret to converting a lackluster chandelier into a show-stopping creation that radiates elegance and sophistication.
With a few simple tweaks, you can change your outdated fixture into a stunning centerpiece that enhances your entire space.
Start by selecting a chandelier style that connects with your personal taste, whether it's modern and sleek or ornate and vintage-inspired.
Next, experiment with innovative lighting materials, such as reclaimed wood, metal, or crystals, to add texture and depth to your design.
Vintage Shade Revamp
With vintage shades, the possibilities for upcycling are endless, and the results can be nothing short of breathtaking. You can convert outdated fixtures into unique, one-of-a-kind pieces that reflect your personal style. By combining vintage materials with modern twists, you'll create a look that's both nostalgic and contemporary.
| Vintage Shade Style | Modern Twist |
|---|---|
| Antique metal frames | Bold, bright color schemes |
| Distressed linen shades | Industrial-chic metal accents |
| Ornate glass fixtures | Minimalist, monochromatic hues |
When selecting vintage materials, consider the era and aesthetic you want to evoke. Then, balance those elements with modern touches to create a cohesive look. With a little creativity, you'll be able to craft a lighting fixture that's truly show-stopping.
Painting Furniture Like Pro
As you begin painting furniture like a pro, you'll soon realize that careful preparation is key to achieving a flawless finish.
You'll need to prep your piece for perfection, sanding away imperfections and ensuring a smooth canvas for your chosen hue.
Prep for Perfection
A blank canvas awaits, and the furniture piece you've chosen to convert is the ultimate artistic challenge.
Before you release your creativity, you must prep for perfection. This vital step sets the tone for a flawless finish.
-
Cleanliness is key: Wipe down the furniture with a damp cloth to remove dirt, grime, and old wax.
-
Sand it smooth: Use a fine-grit sandpaper to even out the surface, removing imperfections and rough spots.
-
Tape it off: Apply painter's tape to protect areas you don't want to paint, like hardware or intricate carvings.
- Prime for perfection: Apply a coat of primer to create an even base for your chosen color palette and texture combinations.
Choose the Right Coat
You've primed your furniture piece to perfection, and now it's time to release your creativity with the perfect coat of paint.
When choosing a coat, consider the fabric choices and overall aesthetic you want to achieve. There are various coat types to select from, each offering distinct benefits.
A matte coat provides a subtle, understated look, while a glossy coat adds a touch of sophistication. If you want to add texture, consider a chalkboard or rough-finish coat.
For a more rustic appearance, opt for a distressed or vintage-inspired coat. Whichever coat type you choose, make sure it aligns with your design vision and complements the fabric choices and overall style of your furniture piece.
Easy Throw Pillow Covers
Within the domain of home decor, few elements possess the life-changing influence of a well-placed throw pillow. You can easily create your own stunning throw pillow covers with minimal sewing skills and a few simple materials.
To get started, focus on fabric selection - consider velvet for a luxurious feel, linen for a natural look, or cotton for a playful vibe.
- Choose a fabric that complements your existing decor, or goes bold with a contrasting hue.
- Measure and cut two identical squares of fabric, leaving a 1-inch margin around the pillow's edges.
- Place the fabric pieces right sides together and sew around the perimeter, leaving a small opening for pillow stuffing.
- Turn the cover right side out, fill with pillow stuffing, and sew the opening shut by hand.
With these easy steps, you'll be on your way to creating a beautiful, one-of-a-kind throw pillow that adds a pop of personality to your space.
Reclaimed Wood Decorations
By incorporating reclaimed wood decorations into your home, you can infuse your space with a sense of history and character.
You'll be amazed at the unique stories each piece tells, from weathered barn doors to distressed factory floors.
To get started, investigate various reclaimed wood sources, such as local salvage yards, Habitat for Humanity ReStores, or online marketplaces.
Once you've selected your wood, experiment with wood staining techniques to enhance its natural beauty.
Try a rustic, distressed look or a sleek, modern finish – the possibilities are endless.
With reclaimed wood decorations, you'll add depth and personality to your rooms, and create a space that truly reflects your style.
Beginner-Friendly Mosaic Art
As you begin creating beginner-friendly mosaic art, you'll need to thoughtfully select mosaic tiles that harmonize in color, texture, and shape to bring your vision to life.
To craft a visually stunning piece, you'll want to experiment with pattern design ideas that echo your personal style, from geometric motifs to playful illustrations.
Mosaic Tile Selection
In the domain of mosaic art, selecting the right tiles is similar to choosing the perfect palette for a masterpiece - it sets the tone and lays the foundation for a stunning visual narrative.
As you initiate your beginner-friendly mosaic art project, you'll want to curate a harmonious color palette that harmonizes with your personal style. To achieve this, consider the following essential tile characteristics:
- Color: Will you opt for a bold, contrasting palette or a softer, monochromatic scheme?
- Texture: Do you prefer smooth, glossy tiles or rough, matte finishes?
- Shape: Will you work with traditional square tiles or experiment with irregular shapes?
- Size: How will the tile size impact the overall scale and intricacy of your design?
Pattern Design Ideas
With your tile selection in hand, you're ready to plunge into the creative domain of pattern design, where the possibilities are endless and the fun begins.
Geometric patterns, such as chevrons or hexagons, offer a modern and sleek aesthetic, perfect for contemporary spaces. Alternatively, floral motifs can add a touch of elegance and sophistication, transporting you to a world of vintage charm.
You can choose to create a bold, eye-catching design or a subtle, understated look, depending on your personal style. Remember, the key to success lies in balance and harmony.
Experiment with different patterns, colors, and textures to create a unique design that reflects your personality and complements your space.
Creating Gallery Wall Displays
Hang a collection of frames on your wall, and suddenly, the space changes into a visual masterpiece.
You'll be amazed at how a thoughtful arrangement of framed photos can enhance the ambiance of a room. To create a stunning gallery wall display, start by gathering frames in varying shapes, sizes, and styles.
Then, experiment with different wall arrangements to find the perfect layout.
Consider the following ideas to inspire your design:
- Symmetrical harmony: Align frames symmetrically around a central axis for a sense of balance and order.
- Eclectic mix: Combine frames of different shapes, sizes, and materials for a visually interesting display.
- Themed grouping: Cluster frames around a specific theme, such as travel or family, to tell a story.
- Visual flow: Create a sense of movement by arranging frames in a diagonal or curved pattern.
Decoupage Furniture Makeovers
As you breathe new life into an old piece of furniture, the alteration is nothing short of magical.
With decoupage furniture makeovers, you're not just refinishing - you're reimagining. Start by honing your furniture preparation techniques, such as sanding and priming, to create a smooth canvas for your design.
Next, choose from a vast array of decoupage material options, from vintage prints to bold graphics, to add personality to your piece.
Apply your design with precision, using a sealant to protect and enhance the finish.
As you work, envision the end result: a one-of-a-kind masterpiece that reflects your personal style.
With every brushstroke, you're taking control of your space, crafting a look that's uniquely yours.
Rustic Wooden Sign Creations
Now that you've released your creativity on a decoupage furniture makeover, it's time to channel that same energy into crafting a rustic wooden sign that exudes warmth and character.
With a few simple tools and materials, you'll be able to create a unique piece that reflects your personal style.
Here are some ideas to get you started:
-
Summer Vibes: Create a distressed wooden sign with a personalized quote, such as "Seas the Day," to hang above your porch or patio.
-
Seasonal Designs: Craft a wooden sign with a seasonal design, like a pumpkin for fall or a snowflake for winter, to add a touch of whimsy to your mantel or front door.
-
Rustic Charm: Use reclaimed wood to create a sign with a vintage-inspired design, such as a distressed arrow or a worn wooden clock.
- Family Memories: Design a wooden sign with a special message or inside joke to create a one-of-a-kind piece that celebrates your family's bond.
Frequently Asked Questions
What Are the Essential Tools Needed for Most Home Decor Projects?
You're about to release a DIY hurricane, but first, gather your trusty sidekicks: a hammer, level, tape measure, and screwdrivers. Organize them neatly, plan your project carefully, and you'll be the expert of your domain, ready to conquer any home decor challenge that comes your way!
How Do I Choose a Color Scheme for My Entire Home?
You'll expertly select a color scheme by considering color psychology, which reveals how hues impact your mood, and crafting harmonious palettes that flow seamlessly throughout your space, ultimately reflecting your unique style and personality.
Can I Use Low-Quality Materials for a DIY Project?
You might think, "Why break the bank on fancy materials?" but remember, using low-quality materials can lead to a DIY project that looks cheap and falls apart quickly, compromising its durability, so investigate low-cost alternatives that balance affordability with material durability.
How Much Time Should I Dedicate to a DIY Project Each Week?
When tackling a DIY project, you'll want to allocate a realistic time frame, dedicating a specific number of hours each week, ensuring effective time management and project planning, allowing you to make steady progress without feeling overwhelmed.
Are DIY Home Decor Projects Suitable for Renters or Landlords?
As you weigh DIY home decor projects, consider your rental status: you'll want temporary solutions that work within rental restrictions, ensuring you can easily reverse any changes when your lease ends, maintaining a harmonious relationship with your landlord.
Related Posts
-

Ceiling Storage Solutions for Your Garage
Unlocking the Sky's the Limit with Ceiling Storage Solutions for Your Garage Declutter and Maximize Your Space with ...
-

7 Best Ways to Declutter Your Digital Life
You're tired of drowning in digital clutter! To take control, start by purging unused subscriptions, and organizing y...
-

Boost Productivity With a Home Office Makeover
By altering your home office into a clutter-free, ergonomic, and inspiring space, you'll reveal your full productivit...


