Easy DIY Closet Shelving Plans With Step-By-Step Guides
Share
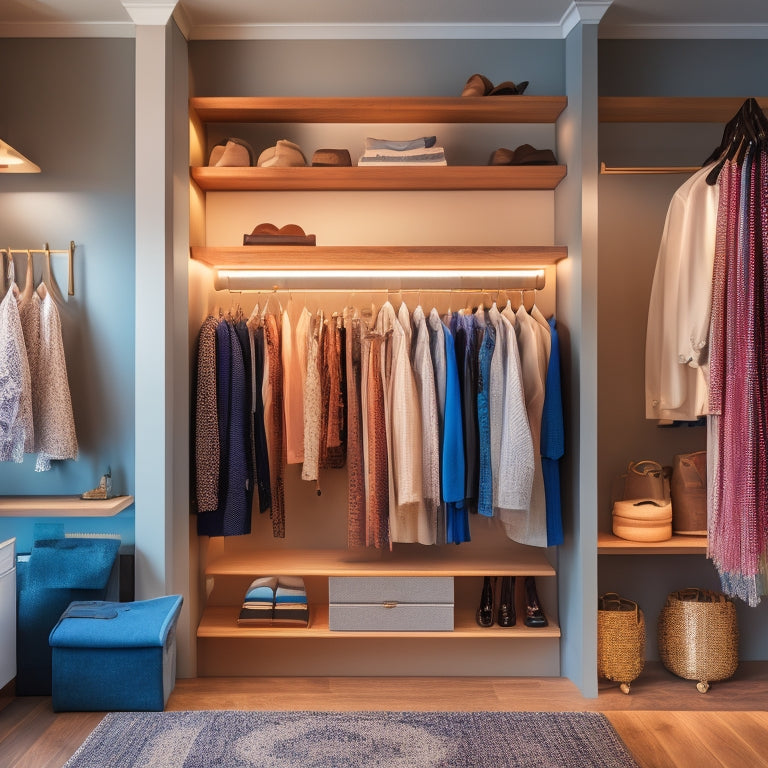
You're about to create a stunning closet with easy DIY shelving plans, complete with step-by-step guides. Start with simple shelving designs for beginners, using materials like MDF, plywood, or wood. For a customizable approach, incorporate adjustable shelves, baskets, or bins, and add shelf dividers for organization. Consider building a floating shelf system, choosing from various materials and finishes. Maximize storage with shelves, drawers, and bins, and group items by color for visual appeal. With these plans, you'll be able to create a functional and stylish space that meets your specific needs - and with the right guidance, you'll be able to tackle even more complex projects.
Key Takeaways
• Choose a simple shelving design with minimal tools and materials for an easy DIY project.
• Measure twice, cut once, and ask for help when needed to ensure accuracy and safety.
• Opt for adjustable shelves and stackable storage units for maximum customization and flexibility.
• Use step-by-step guides and online tutorials to help you navigate the DIY process.
• Select materials like MDF, plywood, or wood for stability and durability in your closet shelving project.
Simple Shelving Designs for Beginners
You'll start by building a basic shelving unit with three to five shelves, depending on the space available in your closet, using a simple design that requires minimal tools and expertise. Don't worry, you won't need a PhD in carpentry to get this done!
A standard shelving layout typically consists of vertical posts, horizontal shelves, and back panels. For a beginner-friendly design, opt for a fixed shelving layout, where shelves are attached to the vertical posts using screws or brackets. This is easier to execute than an adjustable shelving layout, which requires more complicated hardware.
When it comes to material options, you're spoiled for choice. You can go for affordable and durable MDF or plywood for the shelves, and use wooden or metal posts for added stability. If you're feeling fancy, throw in some decorative trim to conceal any gaps between the shelves and back panels.
Just remember to measure twice, cut once, and don't be afraid to ask for help if you get stuck. With these simple shelving designs, you'll be well on your way to a more organized closet that's the envy of all your friends!
Customizable Closet Shelving Ideas
With your basic shelving unit in place, consider taking your closet organization to the next level by incorporating customizable features that cater to your specific storage needs. You can add adjustable shelves, baskets, or bins to accommodate items of varying sizes. For instance, you can install shelf dividers to separate clothes, shoes, or accessories, keeping them organized and easily accessible.
To maximize your closet's vertical space, consider adding stackable storage units or hanging rods with built-in shelves. You can also incorporate creative storage solutions, such as a shoe organizer or a hanging accessory holder, to keep clutter at bay.
Another idea is to install a pull-out drawer or a slide-out shelf, providing easy access to items stored in the back of your closet. By incorporating these customizable features, you'll be able to create a closet organization system that's tailored to your unique needs and preferences.
With a little creativity, you can turn your closet into a functional and stylish space that makes your daily routine a breeze.
Building a Floating Shelf System
When building a floating shelf system, you'll need to carefully consider the design of your shelves. This involves taking into account factors like the weight capacity, material, and finish.
You'll also need to master specific installation techniques to guarantee your shelves are securely fastened to the wall and can support the desired load.
Shelf Design Considerations
Designing a floating shelf system requires careful planning to ensure the shelves are both visually appealing and structurally sound. You're not just building a shelf, you're creating a work of art that'll hold your favorite books, clothes, or decorations. So, let's get down to business!
When it comes to shelf material options, you've got a plethora of choices. Are you a fan of rustic wooden shelves or sleek, modern glass ones? Maybe you're feeling adventurous and want to try something unique like reclaimed wood or metal? Whatever you choose, make sure it complements your closet's aesthetic and can support the weight of your belongings.
Shelving depth considerations are also essential. You don't want your shelves to be too shallow, or your items will be teetering on the edge. On the other hand, you don't want them to be too deep, or they'll be awkward to access. Aim for a depth of around 12-15 inches, depending on what you'll be storing.
Shelf Installation Techniques
You'll need to carefully plan the shelf installation process to make certain your floating shelf system is securely fastened to the wall and can support the weight of your belongings. After all, you don't want your prized possessions crashing to the floor! To guarantee a successful installation, follow these shelving installation techniques.
| Step | Action |
|---|---|
| 1 | Locate the wall studs using a stud finder to determine the best anchoring points. |
| 2 | Mark the wall with a level to confirm straight shelves. |
| 3 | Drill pilot holes for the screws to avoid damaging the wall. |
| 4 | Install the shelf brackets, making certain they're level and secure. |
DIY Closet Storage Solutions
Maximizing your closet's storage capacity requires incorporating a combination of shelves, drawers, and bins that cater to your specific needs and preferences. You're not just storing clothes, you're creating a personalized oasis.
To achieve closet organization nirvana, consider a color-coordinated system where similar hues are grouped together. This visual trick will make your space feel more spacious and less chaotic.
Now, let's talk shoes – those stilettos and sneakers take up valuable real estate! Designate a shoe storage area with stackable shelves or a shoe rack. This will keep your floors clear and your shoes organized.
Don't forget about accessory display – scarf hooks, belt racks, and jewelry organizers will keep your accessories tidy and easy to find. With a little creativity, you can turn your closet into a functional and stylish space that makes your morning routine a breeze.
Easy Shelving Installation Tips
With your closet's storage solutions in place, it's time to focus on installing shelves that will keep your belongings organized and within reach. Now, it's all about creating a shelving layout that makes sense for your space and your stuff.
Before you start hammering away, take a step back and visualize how you want your shelves to look. Consider the height, width, and depth of your shelves, as well as the type of items you'll be storing on them. Make sure your shelving layout is functional, yet aesthetically pleasing.
Next, gather your installation tools, including a level, drill, screws, and wall anchors. Don't be afraid to get creative with your shelving design, but remember to keep it sturdy and secure. Use wall anchors to prevent your shelves from tipping over, and make sure they're level to avoid any wonky installations.
With the right tools and a solid plan, you'll be enjoying your new shelves in no time. Just remember to measure twice, and hammer once – you don't want any DIY disasters!
Space-Saving Closet Organizers
When designing your DIY closet shelving plans, you'll want to incorporate space-saving closet organizers to make the most of your available space.
You'll need to contemplate how to maximize your vertical space, create shelves for folded items like sweaters and jeans, and utilize double rod storage for hanging clothes.
Maximizing Vertical Space
By installing shelves, rods, and storage units that stretch from floor to ceiling, you can effectively triple your closet's storage capacity while maintaining easy access to your belongings. This is the key to maximizing vertical space in your closet organization project.
By going vertical, you can take advantage of the often-wasted space above your head, freeing up floor space for other essential items.
When it comes to DIY shelving, vertical storage is a game-changer. Consider installing shelves with adjustable heights to accommodate items of varying sizes. You can also use stackable storage bins or baskets to keep items like out-of-season clothing, linens, or accessories organized and out of the way.
To take your space-saving strategies to the next level, consider adding a pegboard or hooks for hanging belts, bags, or accessories. This will keep them organized and within reach, while keeping your floor and shelves clear.
Shelves for Folded Items
You'll want to allocate a section of your closet to shelves specifically designed for folded items, as these space-saving closet organizers enable you to store a large quantity of garments in a compact footprint.
When planning your shelves, consider the type of folded items you'll be storing - will it be t-shirts, sweaters, or jeans? This will help you determine the ideal shelf depth and height. Make sure to leave enough space between each shelf for easy access and visibility.
To maximize storage, pair your folded item shelves with hanging organizers and drawer dividers to keep your closet organized and clutter-free. You can also consider installing clothing racks with built-in shelves for folded items, or incorporate shoe storage cubbies to keep your footwear organized.
Double Rod Storage
Your double rod storage setup can greatly enhance your closet's storage capacity, allowing you to double-hang garments and store more items in a fraction of the space. With a well-planned rod placement, you can maximize your closet's vertical space and reduce clutter. Double rod benefits include increased storage capacity, reduced wrinkling, and easier organization.
Here's a sample layout to contemplate:
| Rod Placement | Double Rod Benefits | Space Savings |
|---|---|---|
| Top rod at 80' | Double-hang long items | 50% more space |
| Bottom rod at 40' | Store out-of-season items | 20% more space |
| Rods spaced 12' apart | Reduce wrinkling and creasing | 10% more space |
| Rods centered at 60' | Easy access to frequently worn items | 30% more space |
| Rods installed at an angle | Create a sense of depth and visual appeal | 15% more space |
DIY Adjustable Shelving Plans
Create adjustable shelving that accommodates changing storage needs by constructing shelves with movable brackets and supports. You'll be able to easily reconfigure your shelves as your storage requirements evolve.
To get started, you'll need to select the right materials, such as durable wood or metal, and decide on the type of adjustable shelf brackets you want to utilize. Modular shelving systems are a great option, as they allow you to add or remove shelves as necessary.
When building your shelves, make sure to measure accurately and use levelers to secure everything is straight. You don't want your shelves to be askew, do you?
Once you've built the basic structure, you can add the adjustable shelf brackets. These will enable you to move the shelves up or down to accommodate items of different sizes. With adjustable shelving, you'll be able to maximize your storage space and keep your closet organized.
Plus, you'll be able to adjust your shelves as your needs change over time. It's a win-win!
Closet Shelving on a Budget
Building closet shelving on a budget requires strategic planning and resourcefulness to achieve functional storage without breaking the bank. You'll need to think outside the box (or in this case, the closet) to come up with creative solutions that won't drain your wallet.
One approach is to explore upcycled shelving options, where you breathe new life into old or discarded materials. This not only saves you money but also reduces waste and adds a touch of personality to your closet.
Here are some thrifted storage ideas to get you started:
-
Repurpose old crates as shelves or storage bins.
-
Use reclaimed wood to create a one-of-a-kind shelving unit.
-
Transform vintage ladders into space-saving storage solutions.
- Upcycle old bookshelves into functional closet organizers.
Creating a Custom Closet System
When creating a custom closet system, you'll need to carefully plan and execute three essential steps.
First, you'll design the space to optimize its functionality and flow, considering factors like shelf height and storage capacity.
Next, you'll build the structure, which involves constructing the shelves, drawers, and other components that will hold your belongings.
Designing the Space
How will you optimize your closet's unique dimensions to accommodate your specific storage needs and preferences? This is where designing the space comes in. You'll need to create a closet layout that makes the most of every inch, while also considering your personal style and storage requirements.
To get started, take inventory of the items you want to store in your closet, and group them into categories (e.g., tops, bottoms, dresses, accessories).
Then, consider the following key factors:
-
Double-hang rods: Will you need two rods, one for tops and one for bottoms, or a single rod with double-hang capability?
-
Shelf placement: Where will you place shelves for folded items, baskets, or bins?
-
Corner utilization: How will you maximize the often-wasted space in corners?
- Accessory storage: Where will you store belts, scarves, hats, and other accessories?
Building the Structure
With your design plan in hand, you're ready to bring your custom closet system to life by constructing the framework that will support your shelves, rods, and accessories. This is where the magic happens, and your closet organization dreams start taking shape. To guarantee your space-saving solutions don't come crashing down, focus on building a sturdy structure that prioritizes structural integrity.
Start by building the vertical supports, using 2x4 lumber or MDF, depending on your design plan. Make sure to space them evenly, typically 12-16 inches apart, to accommodate your shelving layout.
Next, create the horizontal shelves, using 3/4-inch plywood or MDF, and attach them to the vertical supports using screws or nails. Don't forget to add additional support brackets for heavier shelves or areas that'll hold a lot of weight.
As you build, double-check your measurements and level everything to guarantee your structure is square and plumb. Remember, a solid framework is the backbone of a successful closet organization system, so take your time and get it right.
With a sturdy structure in place, you'll be ready to add your shelves, rods, and accessories, and enjoy your newfound closet space!
Choosing the Materials
You've established a sturdy framework, now it's time to select the components that will bring your custom closet system to life, and the right choices will depend on your specific design plans, budget, and personal preferences.
When it comes to material selection, budget considerations are essential. You don't want to break the bank, but you also don't want to compromise on quality.
Here are some key factors to keep in mind when choosing materials:
-
Durability: Will the materials withstand the weight and wear of your belongings?
-
Eco-friendliness: Are you opting for sustainable, eco-conscious options that won't harm the environment?
-
Aesthetics: Do the materials align with your desired style and design?
- Budget: Are the materials within your budget, and will they provide a good return on investment?
Maximizing Closet Storage Capacity
Optimizing your closet's vertical space is essential to maximizing storage capacity, as it allows you to make the most of often-wasted areas above shelves and beneath hanging rods. By doing so, you'll be able to fit more items without sacrificing floor space. Now, let's get down to business and tackle that clutter!
Here are some closet organization and decluttering tips to get you started:
| Area | Challenge | Solution |
|---|---|---|
| Corners | Dead space | Install carousel shelves or baskets |
| Top Shelves | Hard to reach | Use stackable bins or baskets with handles |
| Bottom Shelves | Cluttered | Utilize baskets or bins with labels |
| Hanging Rods | Limited space | Add double rods or use hanging organizers |
Frequently Asked Questions
Can I Use MDF Boards for Building Closet Shelving?
"Think of MDF boards as the reliable coworker who gets the job done, but lacks the charm of solid wood. You can use them for closet shelving, but be prepared for limited shelf finishes and potential humidity issues."
Are There Any Specific Tools Required for DIY Shelving Projects?
You'll need a mix of power tools, like a circular saw and drill, and hand tools, like a tape measure and level, to tackle your DIY shelving project - don't worry, it's not as overwhelming as it sounds!
Can I Install Closet Shelving Without Professional Help?
You're a brave DIY warrior, ready to conquer closet chaos! Yes, you can install closet shelving without pros, but be prepared to wield your DIY sword, embracing closet organization techniques and trading sweat for a sense of accomplishment.
How Do I Measure My Closet Space for Shelving Accurately?
'You're about to become a closet wizard! To measure your closet space accurately, grab a tape measure and record the width, depth, and height of each wall, considering any obstacles, to guarantee ideal closet organization and space-saving design.'
Are DIY Closet Shelving Plans Suitable for Small Closets?
"Think of your small closet as a puzzle, and you're the master solver! You'll find that DIY closet shelving plans are perfect for small closets, offering closet organization and space-saving solutions that maximize storage, even in the tiniest of spaces."
Related Posts
-

Budget-Friendly Home Storage Solutions You Can DIY
You can transform your cluttered space into an organized oasis without breaking the bank by leveraging creative DIY s...
-

Declutter Your Drawers: 10 Genius Storage Hacks
You can breathe new life into your cluttered drawers by implementing a few genius storage hacks. Start by maximizing ...
-

10 Space-Saving Secrets for Cluttered Homes
You can banish clutter and breathe easy again by optimizing your home's vertical space with wall-mounted racks and sh...


