Build Custom Closet Shelving Unit With These Plans
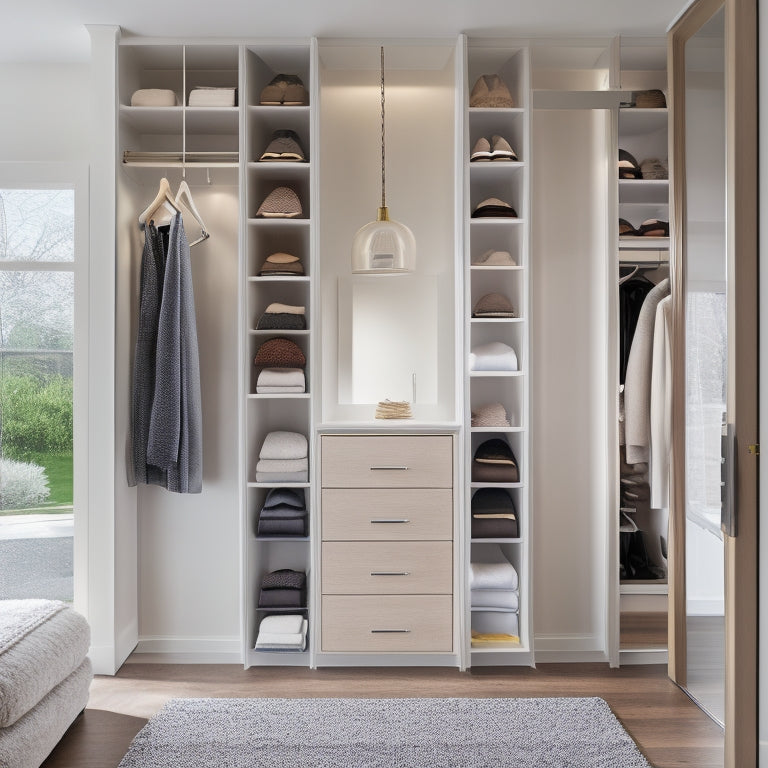
You're about to transform your closet into a highly functional and personalized space with a custom shelving unit that meets your specific needs and style preferences. Start by selecting materials that balance durability, aesthetics, and budget. Measure your closet space precisely, noting obstructions and "zones" for different storage needs. Design a shelving layout that accommodates daily use items and creates a functional flow. Construct a sturdy frame, install shelves and supports, and add a drawer system for maximum storage. Finally, incorporate hanging rods, finishing touches, and decorative elements to create a space that's truly yours. Now, get ready to make it happen.
Key Takeaways
• Measure the closet space accurately, considering obstructions and 'zones' for different storage needs to ensure a functional layout.
• Choose materials that balance durability, aesthetics, and budget, such as wood, metal, or composite materials, and consider their weight capacity and support requirements.
• Design a shelving layout that caters to daily use items, allocating space for each category and incorporating features like adjustable shelves and corner shelves for optimized storage.
• Construct a sturdy shelving frame using vertical side panels, horizontal top and bottom panels, and vertical supports, ensuring corners are secure and the frame is square.
• Install shelves, supports, and drawer systems carefully, following manufacturer's instructions and considering weight capacity, support requirements, and smooth operation.
Choosing the Right Materials
When building a custom closet shelving unit, you'll need to select materials that balance durability, aesthetics, and budget. So, start by considering the type of wood, metal, or composite materials that will best suit your design and functional requirements. Material selection is pivotal, as it'll impact the overall look and feel of your closet.
You'll want to think about the style you're going for - modern, traditional, or a mix - and how it'll fit with your existing decor. Budget considerations are also key, so set a price range and stick to it. Don't be tempted by fancy materials that'll break the bank!
For wood, you can opt for affordable options like pine or MDF, or splurge on high-end varieties like walnut or oak. Metal shelving units are sleek and modern, while composite materials offer a durable, low-maintenance alternative.
Once you've chosen your material, think about color choices - will you go for a bold statement or a more subtle, neutral tone? With so many options, it's easy to get overwhelmed, but by considering your style, budget, and functional needs, you'll be well on your way to creating a custom closet shelving unit that's both beautiful and functional.
Measuring Your Closet Space
When building a custom closet shelving unit, you'll need to take precise measurements of your closet space to guarantee a perfect fit.
You'll want to record the length, width, and height of the closet, as well as the location of any obstructions like plumbing, electrical outlets, or windows.
Closet Dimensions Matter
Measure your closet space carefully, as accurate dimensions are essential to designing a custom shelving unit that maximizes storage capacity and fits snugly within the available area. You don't want to end up with a shelving unit that's too big or too small for your closet. That'd be like trying to squeeze into a pair of jeans from high school – not happening!
To get started, take note of the following dimensions:
| Dimension | Description |
|---|---|
| Width | Measure from wall to wall, including any obstructions like pipes or electrical outlets |
| Depth | Measure from the back wall to the front of the closet, taking into account any angles or recesses |
| Height | Measure from the floor to the ceiling, considering any overhead shelves or ductwork |
| Doorway | Measure the width of the doorway, including any molding or trim |
| Obstacles | Identify any obstacles like windows, alcoves, or built-in shelves that may affect your design |
Space Measurement Tips
You'll want to grab your tape measure and carefully pace out your closet space to secure accurate readings, as even a slight miscalculation can throw off your entire design. Don't assume you know the measurements – trust us, you'd be surprised how often homeowners misjudge their space. Take note of any obstructions, like plumbing, electrical outlets, or windows, that might affect your design.
When measuring, consider the 'zones' within your closet. Measure the areas where you'll be storing different items, like shirts, pants, and shoes. This will help you optimize your space and create a functional design that meets your specific storage needs. Remember, the goal is to maximize your closet's potential for efficient storage solutions.
As you measure, think about how you can optimize your space for better closet organization. Consider the height of your shelves, the width of your rods, and the depth of your storage units. By taking precise measurements, you'll be able to create a custom closet shelving unit that's tailored to your unique needs, ensuring a space that's both stylish and functional.
Designing Your Shelving Layout
Design your shelving layout by first determining the types of items you plan to store in your closet, as this will influence the number and size of shelves you need. Think about the items you use daily, like clothes, shoes, and accessories, and consider the space you'll need for each category. This will help you achieve best shelving organization and maximize space.
Next, consider the closet functionality you want to achieve. Do you want double rods for extra hanging space, or shelves for folded items? Think about the storage solutions you need, like bins for socks or baskets for accessories. Measure the items you plan to store and calculate the shelf space you'll need. Don't forget to leave some breathing room between shelves for easy access.
With a clear plan, you'll be able to create a custom closet shelving unit that meets your specific needs and makes the most of your space. By taking the time to design your shelving layout thoughtfully, you'll end up with a closet that's both functional and fabulous.
Building the Shelving Frame
Your shelving frame's backbone is its vertical side panels, which you'll construct from 3/4-inch plywood or medium-density fiberboard (MDF) to guarantee stability and support for the shelves. Cut four panels to the desired height, ensuring they're identical to maintain shelving stability. Use a miter saw or circular saw to make clean cuts, and sand the edges to prevent splinters.
Next, create the frame's horizontal top and bottom panels using 3/4-inch plywood or MDF. Cut these panels to the desired width, slightly shorter than the vertical side panels. Assemble the frame by attaching the horizontal panels to the vertical side panels using 2 1/4-inch wood screws. Make sure the corners are secure and the frame is square.
For frame reinforcement, add vertical supports between the top and bottom panels. Cut two supports to the desired width and attach them to the inside of the vertical side panels using 2 1/4-inch wood screws. This will provide additional support and prevent the shelves from sagging.
With your frame built, you're ready to move on to the next step – adding shelves and supports!
Adding Shelves and Supports
Cutting shelves to the desired thickness and width, typically 3/4-inch plywood or MDF, guarantees a sturdy base for storing items while allowing for adequate clearance between shelves. Now, it's time to add some shelves and supports to your custom closet shelving unit.
| Shelf Type | Support Requirements |
|---|---|
| Fixed Shelves | 2-3 vertical supports, spaced 24-36 inches apart |
| Adjustable Shelves | 3-4 vertical supports, spaced 12-24 inches apart |
| Corner Shelves | 2-3 diagonal supports, connected to adjacent shelves |
When adding shelves, consider the type of items you'll be storing and the weight capacity you need. For example, if you're storing heavy boxes or bins, you may want to use thicker shelves or add extra supports. On the other hand, if you're storing lighter items like clothes or accessories, you can get away with thinner shelves and fewer supports.
Installing Drawer Systems
Now that you've added shelves and supports to your custom closet shelving unit, it's time to install the drawer systems.
You'll need to focus on three key points:
properly installing the drawer slides,
carefully planning the layout of your drawers, and
selecting the right materials for the job.
Drawer Slide Installation
You'll need to attach the drawer slides to the closet shelving unit's frame, making sure they're properly aligned and securely fastened to support the weight of the drawers and their contents. This is essential for smooth drawer operation and to prevent sagging or collapse. Don't worry, it's not rocket science, but you do need to follow the manufacturer's instructions and take your time.
Here are some tips to keep in mind:
- Make sure the slides are level and parallel to each other for even drawer movement.
- Use the recommended screws and anchors to secure the slides to the frame.
- Don't overtighten the screws, as this can damage the slides or the frame.
- Test the slides by sliding the drawers in and out a few times to make sure they're working smoothly.
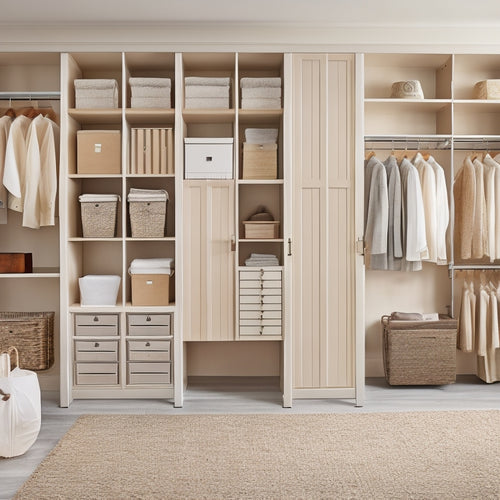
Drawer Layout Considerations
When designing your custom closet shelving unit's drawer layout, consider the best placement and organization of your stored items to optimize storage capacity and accessibility. You want to make sure that your most frequently used items are easily accessible, while less frequently used items are stored out of the way.
To achieve this, categorize your belongings into groups, such as tops, bottoms, dresses, and accessories. This will help you determine the ideal drawer size and configuration for each group.
For maximizing space, consider a tiered drawer system, where smaller drawers are stacked on top of larger ones. This layout allows for more storage capacity while keeping the floor area clear.
You can also incorporate dividers or compartments within each drawer to maintain organization and prevent clutter. Remember to leave some breathing room between drawers for easy opening and closing.
Choosing Drawer Materials
Selecting the right materials for your custom closet shelving unit's drawer system is essential, as it directly impacts the durability, functionality, and overall aesthetic of your storage space. You want your drawers to glide smoothly, hold their weight, and complement your closet's style.
When it comes to material options, you've got a few solid choices:
-
Melamine: A budget-friendly, durable option that's easy to clean and resists scratches.
-
Plywood: A sturdy, cost-effective material that's perfect for building custom drawers.
-
MDF: A dense, flat material ideal for painted or stained finishes.
- Solid wood: The crème de la crème of drawer materials, offering a premium look and feel.
Incorporating Hanging Rods
Incorporate hanging rods at a comfortable height, typically between 60 and 80 inches from the floor, to maximize storage space and accommodate garments of varying lengths. This allows you to hang everything from dresses to shirts without overcrowding the rod.
When planning rod placement, consider the type of garments you'll be storing. If you have a lot of long items, like coats or dresses, place the rod at the higher end of the range. For shorter items, like tops and pants, a lower rod will do the trick.
To maximize hanging space, consider a double rod setup. This allows you to double your hanging capacity, making the most of your closet's vertical space. You can also use rod dividers to separate different types of garments or to create separate sections for different family members.
Finishing Touches and Decor
Now that your custom closet shelving unit is taking shape, it's time to add the finishing touches that will elevate its functionality and aesthetic appeal. You've got the bones of a fantastic closet, but it's the little details that'll make it truly shine.
To take your closet to the next level, consider the following finishing touches:
-
Color schemes: Choose a palette that reflects your personal style, from soft pastels to bold brights. Don't be afraid to get creative and add a statement wall or accent shelf.
-
Decor ideas: Add some visual interest with decorative trim, molding, or even a few well-placed accessories like vases or baskets.
-
Lighting options: Install shelves with built-in lighting or add under-shelf lighting to create a warm, inviting ambiance.
- Accessory choices: Top off your shelves with decorative bins, baskets, or bins to keep clutter at bay and add a touch of personality to your space.
Tips for Customization
To customize your custom closet shelving unit perfectly caters to your specific needs and preferences, you'll want to focus on tailoring its design and functionality to your unique lifestyle and habits. Think about how you use your closet daily. Do you have a lot of long dresses or coats? You might want to add extra-long rods or shelves. Are you a shoe enthusiast? Incorporate shoe racks or cubbies to keep your collection organized.
When it comes to aesthetics, consider your personal style and the overall vibe you want to achieve. Choose a color scheme that reflects your personality, from bold and bright to calm and neutral. Don't be afraid to add some personality with patterned wallpaper or decorative trim. Lighting options can also make a big impact. Install LED strips under shelves for a modern touch or add table lamps for a cozy feel.
Frequently Asked Questions
Can I Use MDF Boards Instead of Plywood for Shelving?
You're wondering if MDF boards can replace plywood for shelving? Honestly, they're not the best choice; MDF's density can make it prone to sagging, compromising shelving stability, but if you're short on cash, it's doable with extra support and clever design tweaks.
How Do I Ensure the Shelves Are Level and Plumb?
You'll avoid wonky shelves by mastering leveling techniques, like using a spirit level or laser level, and taking plumb measurements with a trusty plumb line or digital angle finder – don't worry, it's easier than it sounds!
Are There Any Specific Safety Considerations for DIY Projects?
You're 3x more likely to get hurt DIY-ing on a Sunday (true story!). When tackling DIY projects, you're not just a weekend warrior, you're a safety warrior! Take safety precautions seriously, handle tools with care, and never skip those pesky safety goggles.
Can I Add Electrical Outlets or Lighting to My Closet Shelving?
When adding electrical outlets or lighting to your closet shelving, you'll need to contemplate outlet placement, wiring routes, and safety precautions to avoid electrical shocks or fires; don't forget to check local building codes, too!
How Do I Clean and Maintain My Custom Closet Shelving Unit?
You'll want to dust regularly, vacuum those pesky dust bunnies, and wipe down shelves with a damp cloth; create a maintenance schedule to keep your custom closet shelving unit looking fabulous and functional!
Related Posts
-

Laundry Room Storage Hacks for Tiny Spaces
You're working with a tiny laundry room, and every square inch counts. To maximize storage, start by utilizing vertic...
-
What Makes a Closet Organization System Efficient?
You achieve an efficient closet organization system by understanding your space, purging clutter, and categorizing be...
-
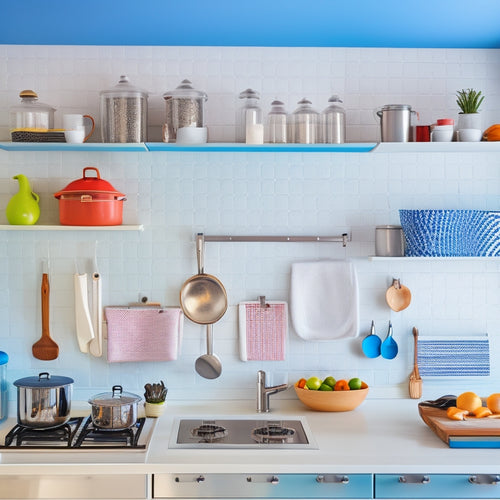
10 Essential Tips to Organize Your Compact Kitchen
You're about to change your compact kitchen into a highly functional and organized space that makes meal prep a breez...


