Organize Your Garage Workbench
Share
Organize Your Garage Workbench: A Comprehensive Guide
Is your garage a disorganized mess, with tools scattered everywhere and no clear workspace? It's time to take control and create an organized, efficient workbench that will make your projects a breeze. Our comprehensive guide will walk you through every step of the process, from choosing the right materials to maximizing storage space.
Step 1: Choose the Right Materials
Your workbench should be sturdy, durable, and able to withstand heavy use. Consider the following materials:
- Metal: Strong and durable, but can be expensive and heavy.
- Wood: More affordable and easier to work with, but not as strong as metal.
- Composite materials: A blend of wood and metal, offering a balance of strength and affordability.
Step 2: Determine the Size and Shape
The size and shape of your workbench will depend on the space you have available and the types of projects you'll be doing. Consider the following factors:
- Width: A 4-foot wide workbench is a good starting point.
- Depth: A 2-foot deep workbench provides ample space for tools and materials.
- Height: A 36-inch high workbench is a comfortable height for most tasks.
Step 3: Build or Buy a Workbench
You can either build your own workbench or purchase one pre-made. If you're handy, building your own workbench can be a cost-effective option. However, if you prefer a more convenient solution, many pre-made workbenches are available at hardware stores and online retailers.
Step 4: Install Pegboard and Shelves
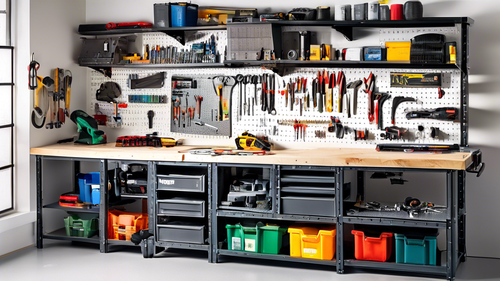
Pegboard and shelves are essential for organizing your tools and supplies. Pegboard allows you to hang tools on hooks, while shelves provide extra storage space for bulky items. Consider installing a pegboard on the wall above your workbench and adding a few shelves underneath.
Step 5: Use Drawers and Bins
Drawers and bins are a great way to store small parts, such as nails, screws, and bolts. Install drawers underneath your workbench and use bins to organize items on your shelves. Label each drawer and bin so you can easily find what you need.
Step 6: Hang Magnetic Tool Holder
A magnetic tool holder is a convenient way to store frequently used tools within easy reach. Hang a magnetic tool holder on the wall near your workbench and place your most commonly used tools on it.
Step 7: Keep Your Workbench Clean
To keep your workbench organized, it's important to clean it regularly. Wipe down your workbench after each use and remove any tools or supplies that you don't need. A clean workbench will make it easier to find what you need and will help to prevent accidents.
Conclusion
By following these steps, you can create an organized, efficient garage workbench that will make your projects a breeze. Remember to choose the right materials, determine the size and shape that works best for you, and install pegboard, shelves, drawers, and bins to maximize storage space. With a little effort, you can have a workbench that you'll love using for years to come.
adjustable garage ceiling storage shelvesRelated Posts
-

Garage Workbench Organization
Garage Workbench Organization: A Guide to Maximizing Space and Efficiency Are you tired of a cluttered and unorgan...
-

Laundry Room Storage Hacks for Tiny Spaces
You're working with a tiny laundry room, and every square inch counts. To maximize storage, start by utilizing vertic...
-

7 Best Corner Shelving Units for Home
You're looking to optimize your home's corner spaces with stylish and functional shelving units. Corner shelves are a...


